CodePeople2
Forum Replies Created
-
Forum: Plugins
In reply to: [Calculated Fields Form] Summary fieldHello @ohtusabes
I’m not sure about your question. The Summary control displays both, the field label or title, and the information the field would send to the server when the form is submitted.
For instance, if you are using a Single Line Text control, a Number field, a Calculated Field, or any other control that features an input box, the value will directly reflect the information entered by the user or the calculated result. Conversely, in controls that offer multiple choices—such as radio buttons, checkboxes, and dropdown fields—you have the ability to determine the information that will be submitted. This is done through the settings of the fields, allowing you to specify whether the submitted data will consist of the choices’ labels or values. This selected information will then be displayed in the summary control.
Best regards.
Forum: Plugins
In reply to: [Calculated Fields Form] Erratic calculationsHello @ohtusabes
In JavaScript the plus (+) operator is overloaded, it is used to add numbers or concatenate texts, and the concatenation takes precedence. To avoid ambiguity, I recommend to use the SUM operation in the plugin:
SUM(3,2,1,0,0)Best regards.
Forum: Plugins
In reply to: [Calculated Fields Form] E-mail customizationHello @ohtusabes
If certain emails are being sent while others are not—despite all being dispatched through the same form—there are several potential causes to consider:
- The emails are being sent; however, they may be blocked by the spam filters of the user’s mailbox. To help ensure successful delivery, please make sure to enter the same email address used with the SMTP server as the “From” attribute in the form settings.
- The SMTP server has its own set of rules that may result in certain mailboxes being blocked. To determine whether the emails were successfully sent, please check the logs of the SMTP connection plugin for detailed information.
Best regards.
Forum: Plugins
In reply to: [Calculated Fields Form] “<” in place of symbolsHello @ohtusabes and @geshra
I sincerely apologize for the delay in my response to your post. I have been working on updating the plugin to address the issue reported. After installing the plugin update, please re-enter the symbol using the form builder. Additionally, I recommend clearing both your website and browser cache to ensure optimal performance. Thank you for your understanding!
Best regards.
Forum: Plugins
In reply to: [Calculated Fields Form] “<” in place of symbolsHello @ohtusabes and @geshra
The issue is related to the sanitization module. I’m checking the issue in detail to implement a solution that preserves the symbols without affecting the plugin’s security.
Best regards.
Forum: Plugins
In reply to: [Calculated Fields Form] Days from future date returns dateHello @jhnpldng
Thank you very much for using our plugin.
Assuming the date field is the fieldname1, and the number field the fieldname2, you can edit the equation as follows:
CDATE(fieldname1-fieldname2, 'dd/mm/yyyy');You can enter any other email format as the second CDATE parameter.
Best regards.
Forum: Plugins
In reply to: [Calculated Fields Form] E-mail customizationHello @ohtusabes
In this case, please, follow the steps described below:
- Insert an “HTML Content” field in the form.
- Tick the “Accept JavaScript code in content” checkbox in its settings.
- Enter the following piece of code as its content:
<script>
fbuilderjQuery(document).on('cff-form-submitted', function(){GOTOPAGE(1);});
</script>
Best regards.
Forum: Plugins
In reply to: [Calculated Fields Form] E-mail customizationHello @ohtusabes
Are you referring to the page 2 in a multipage form? I’m sorry, but the URL provided redirects me to another page without forms.
Best regards.
Forum: Plugins
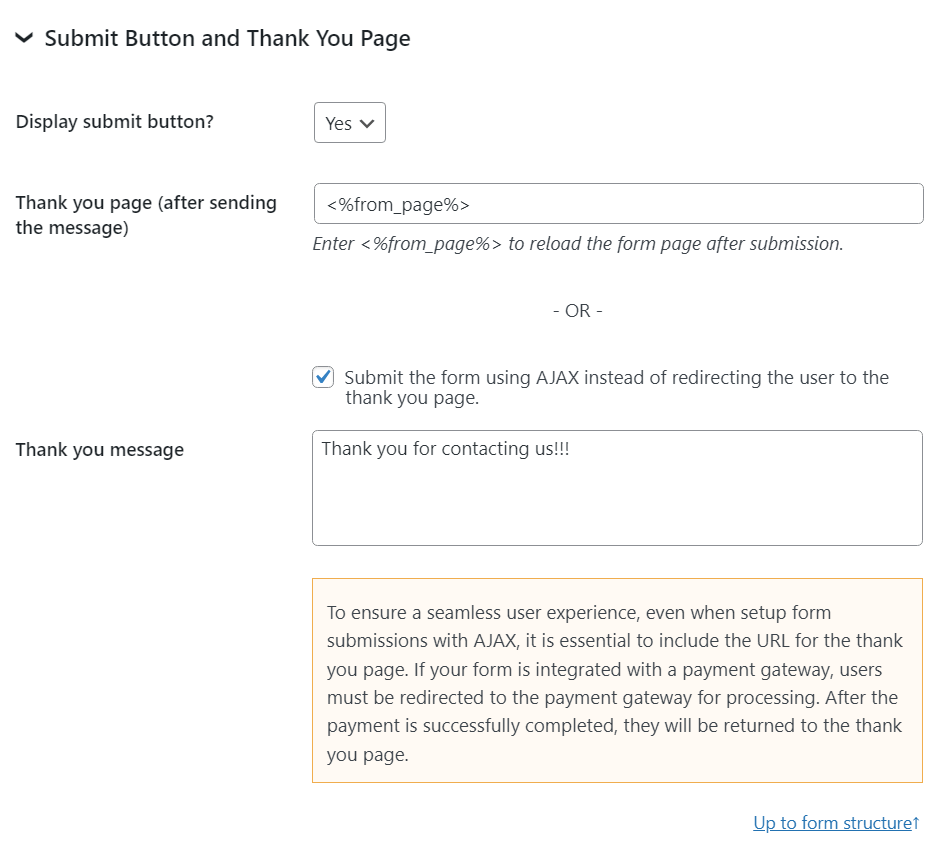
In reply to: [Calculated Fields Form] E-mail customizationHello @ohtusabes
Summary controls are not sent to the server (forms submit only input, textarea, checkbox, radio, and select tags). They allow you to display the information entered by the users directly in the form so they can confirm it is correct before submission. If you want to include in the notification emails the same information displayed in the form by the summary control, you must enter the corresponding fields’ tags.
If you want to submit the form in the background and display a message directly in the form, please tick the “Submit the form via AJAX” checkbox in the form settings and enter the thanks message.
Best regards.
Forum: Plugins
In reply to: [Calculated Fields Form] E-mail customizationHello @ohtusabes
The plugin includes many fields and informative tags to allow you to customize the notification emails as you prefer ( https://cff.dwbooster.com/documentation#special-tags )
I’ll try to describe their use with a hypothetical example.
Supposing your form contains many fields. If you want to include only the fieldname1 and fieldname2 fields in the email, with their labels in bold and values in italics. In this case, you can enter the following tags as the notification email content:
<p><b><%fieldname1_label%></b>: <i><%fieldname1_value%></i></p>
<p><b><%fieldname2_label%></b>: <i><%fieldname2_value%></i></p>
Note you can include other tags like the form title (
<%form_title%>), the form description (<%form_description%>), and more.If you include HTML tags in the notification emails (E.g.
<p>,<b>,<i>) you should select the “HTML” option in the “Email Format” attribute.The URL provided is redirecting me to another page. However, if you want to customize the submit button or display it in a different position in the form, you should select the “No” option for the “Display submit button?” attribute in the form settings, and insert a button field in the place you prefer, and select the “Submit” option as its type in its settings.
Best regards.
Forum: Plugins
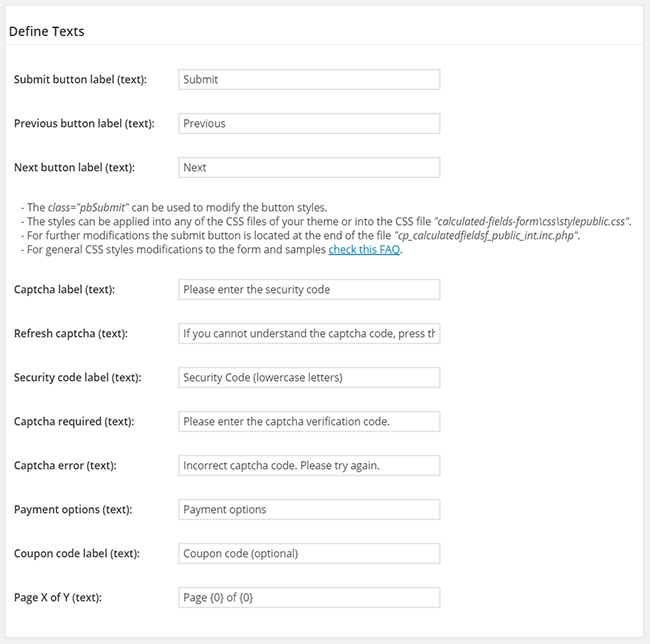
In reply to: [Calculated Fields Form] Label “Submit”Hello @ohtusabes
Thank you so much for using our plugin. The global texts are entered through the “Define Texts” section in the form settings. Enter the new text in the “Submit button label” attribute:
Best regards.
Forum: Plugins
In reply to: [Calculated Fields Form] Checkbox image, but text outputHello @svd89
Please note you are describing a custom behavior. You have many options. You can get the selected choice and parse the img tag with regular expressions to extract the “alt” attribute, get the image and obtain its “alt” attribute with jQuery, or do the same process with vanilla JavaScript. But, as I said above, all of these alternatives are custom behaviors specific to your project. If you need us to implement this part of your project, do not hesitate to contact us through the plugin website. Contact us.
Best regards.
Forum: Plugins
In reply to: [Calculated Fields Form] Checkbox image, but text outputHello @svd89
No, I’m sorry. If you want your form to extract the “alt” attribute from the img tags and use them with the summary fields and the form submission it will be required to customize the form behavior.
If you need a custom coding service, please contact us directly through the plugin website. Contact us.
Best regards.
Forum: Plugins
In reply to: [Calculated Fields Form] Checkbox image, but text outputHello @svd89
If you want to send the text via email and remove the image, you should untick the “Accept submitting HTML as field value” checkbox in the field’s settings.
If you want to hide the image from the “Summary” field, you must do it via CSS. You can enter the style definition below through the “Customize Form Design” attribute in the “Form Settings > Advanced Settings” tab:
.cff-summary-value img {display:none;}Best regards.
Forum: Plugins
In reply to: [Calculated Fields Form] Checkbox image, but text outputHello @svd89
If you want to display the image on the public website but not in the notification emails or the summary, you can tick the option “Choice value” in the “Value to submit” attribute in the field’s settings.
If you want to hide the checkbox control and use the image as the checkbox you can follow the steps described below:
- Assign a custom class name to the checkbox field. E.g.
custom-checkbox-field
The class names are assigned to the fields through their “Add CSS Layout Keywords”.
- Enter the style definition below (or similar), through the “Customize Form Design” attribute in the “Form Settings > Advanced Settings” tab:
#fbuilder .cff-checkbox-field.custom-checkbox-field input{display: none !important;}
#fbuilder .cff-checkbox-field.custom-checkbox-field .dfield label span{border-radius:100px !important;box-sizing:border-box;padding:5px !important;border:2px solid white;}
#fbuilder .cff-checkbox-field.custom-checkbox-field input:checked+span{border:2px solid #0051ba !important;}
Best regards.