The Font Library allows you to manually upload your own collection or connect directly to Google Fonts and manage fonts in WordPress. Starting in 7.0, it is available globally for block themes and classic themes.
Using the Font Library
The Font Library lives in the Admin menu under Appearance > Fonts.

Library
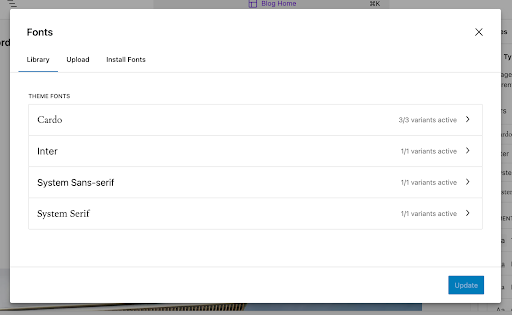
The Library tab contains any fonts installed on the site as well as the theme fonts. Any newly added fonts will appear in this tab.
Upload
You can upload a new collection or a single font file on this tab. The supported formats are .ttf, .otf, .woff, and .woff2
Install Fonts
The Install Fonts tab allows you to install Google Fonts for use on your site.
First, you need to give your site access to Google Fonts.

You can revoke this access by clicking on the three dots button on the right.

Find the font you wish to use using the search box. You can filter search results using the category dropdown menu at top right.

Install a Google Font
To install a font from Google Fonts:
- Choose the desired font
- Select the font variants in the next panel
- Click install
You’ll see a notice indicating whether the font installed successfully. Newly installed fonts will appear in the Library tab.
The available variations will also appear in the Styles section.
Removing fonts

To temporarily remove access to some variants of a font, you can check/uncheck them in the Font Library, then click Update.
To completely remove the font family or single font, click on it, check the box for the font then click Delete. You’ll be prompted to confirm the deletion before the font family is uninstalled.
After a font is deleted, a “Font family uninstalled successfully” notice appears on the main Library tab.
Change a default font
To update a block’s font across your site, navigate to Appearance > Editor > Styles
From here you can change the default font used across the entire site. You can also update the default font used for specific block types such as Heading or Paragraph.
Changelog
- Updated 2026-05-23 (props to @awetz583 @andfinally)
- Updated font menu location for 7.0
- Updated videos and screenshots
- Created 2024-10-17
Was this article helpful? How could it be improved?
Log in to submit feedback. If you need support with something that wasn't covered by this article, please post your question in the support forums.